
We’ve gone through the design of your website, your color choices, and showcasing your best images. Now let’s concentrate on your non-Portfolio pages, where people can find out more about what makes you tick, how far you’ve come, and what’s coming down the pipe. You can create up to five of these Content Pages and title them as you like – these will appear within your site’s navigation menu.
Content Pages are simply images, just like the ones in your portfolios. This means you can create your pages in Photoshop, or your preferred image or layout software, and design your pages using any fonts or images you like. You can add a short biography, current news, client list, contact information, etc.
You can also create hyperlinked (button) areas within your Content Pages that launches a webpage in a new browser window, opens an email browser to send you or your contact a new email message, or downloads a file. This comes in handy for adding links to your blog, your contact email and your agency’s email address, or links to download press releases, client lists and resumes. If this info changes, it’s easy to update your links so you don’t have to worry about having outdated information on your website.
In this tutorial, I’ll show you to how to create your Content Pages and give you some ideas for content you may wish to include.
Prepare your Content Page images beforehand. For directions, see “Create Your Content Page Image“.

Click on the Content Pages tab in your Toolbox. The Content Pages menu is split into three panels: Content Pages, Image Upload, and Button Area. The preview window to the right of the menu displays a preview of your selected Content Page.
1. Click the “Create New” button in the bottom left corner of the Toolbox window.

In the dialog box that appears, select “Content Page” from the drop down menu and title your page. Keep names short, simple and easy to understand (e.g., About, Contact, Events, Client List, Archives, etc.). Don’t use special characters or punctuation such as $, %, < ,>, / ,?, @, # .
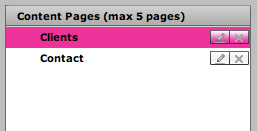
2. Your new Content Page will appear in the Content Page list panel. Select the page by highlighting it in the panel.

3. Once you’ve selected the page, you can upload the Content Page image you created beforehand by clicking the Upload button in the Image panel. This pops up your System file browser where you can browse to your image. Once your image is succesfully uploaded, you can preview it in the preview area.

4 and 5. Now add hotlinks to your page. Make sure you’ve selected a Content Page first. Click the “Create New” button and choose “Button Area” from the drop down menu.

Your new button will appear as a transparent pink rectangle in the top left corner of the preview window. The rectangle won’t appear on your published site – this just lets you see where the clickable area is going to be. Click-and-drag on the button to position it on your page. You can resize it by dragging the corners. You should have the pink rectangle cover the link, image, or email address area you want to make clickable. Select the radio button to set the button to either an email address or URL (web link) and enter the corresponding email address or URL.
6. Publish your new content pages when you’re done.
See the gallery page for examples of how other clickbooq users are using their content pages.